AKA: How to spend $10 to save $500-$1000
There is always a bit of panic that comes over me when a tenant calls with hot water issues, for two reasons. First, tenants get very grumpy very quickly when there is no hot water, so time is of the essence. Second, this could get expensive quickly. This time around, we quickly diagnosed the problem to be the thermocouple and replaced it just as quickly. So I thought I would write up a quick run-down of how we worked through the problem and quickly replaced the thermocouple to avoid making an expensive plumber call.
How do Thermocouples Work?
Thermocouples are brilliant pieces of technology invented in 1821. It is nearly universal on gas water heaters and hasn’t really changed in the last 30-50 years. It works through a nice little physical chemistry trick. Two metals are alloyed together and when they are heated they conduct a small amount of electricity. This electricity activates an electromagnet which allows the gas to flow. If the pilot light goes out, the electricity stops flowing, and the magnet shuts off the gas. It’s really a clever way to make sure we don’t blow ourselves up with something so simple.
How Do Thermocouples Stop Working?
Thermocouples stop working from being in the flame of the pilot light. The flame slowly oxidizes the metal and it degrades. As the shape of the thermocouple and the composition of the alloy change from degradation, the electricity generated will diminish until it can no longer energize the electromagnet to keep the gas flow open. In a nutshell, the pilot light won’t stay lit. Regardless of what you do, the dang thing just goes out repeatedly.
How Do You Replace a Thermocouple on a Hot Water Heater?
Science aside, actually replacing the thermocouple is pretty simple.
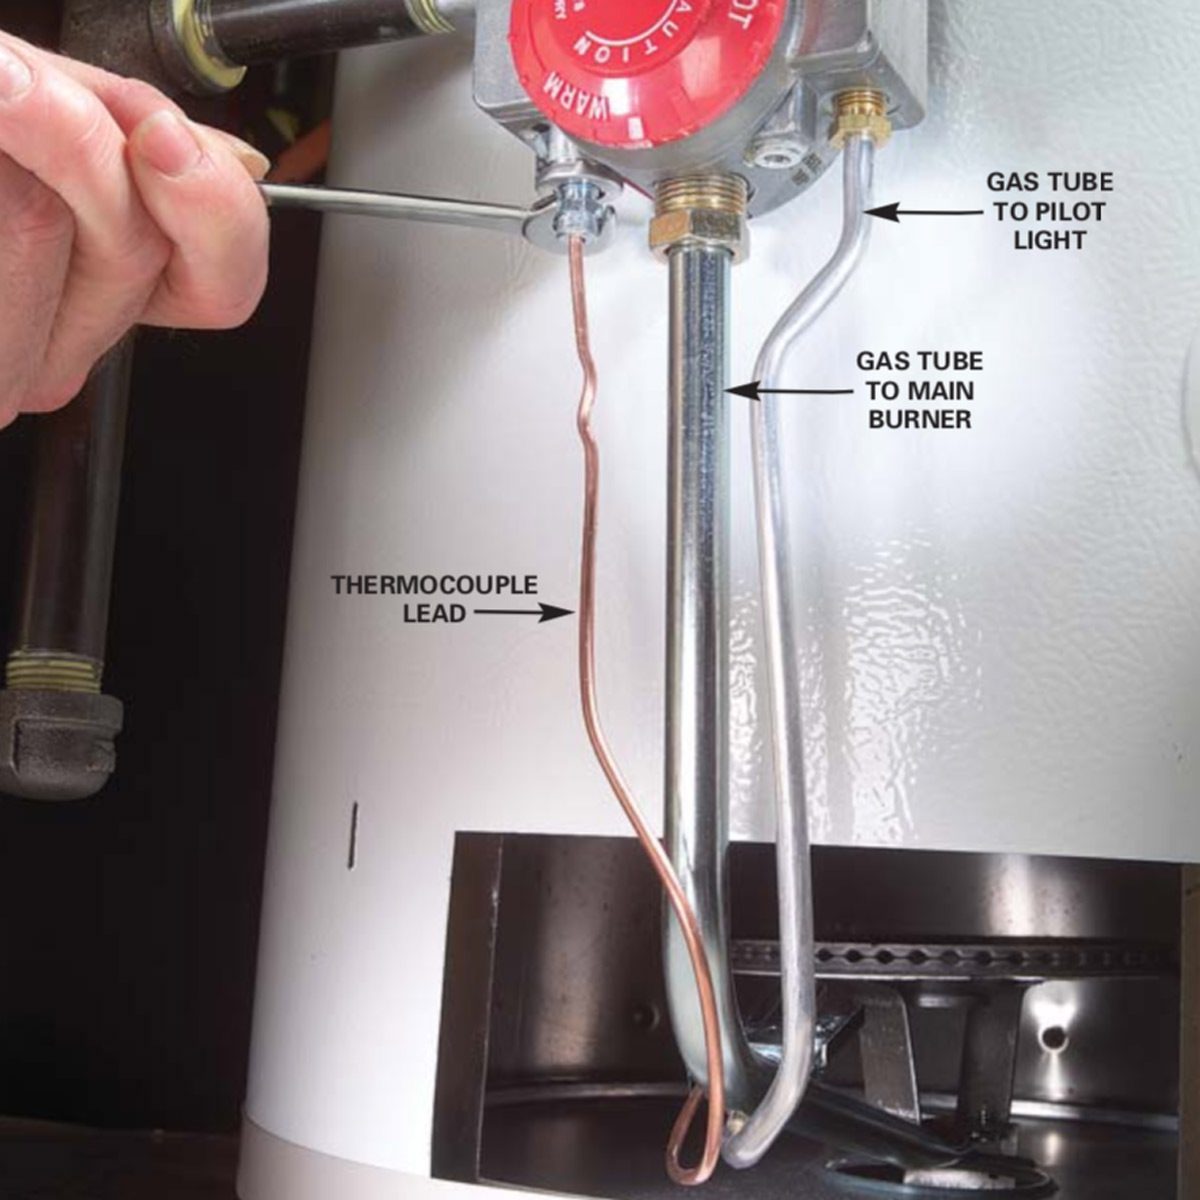
- Identify the thermocouple at the gas valve, and note how it is routed.
- Remove the shields from the access area of the water heater. A screwdriver might be needed.
- Turn off the water heater. Let it cool if it was on before you started, maybe 10 minutes.
- Using an adjustable wrench, loosen and detach the thermocouple from the gas valve body. It is upside down and my be threaded in reverse, so try turning it both ways to see which way it needs to go. Try to remember this to reduce frustration when hooking it back up.
- With a channel locks or vice grip, slowly ease the sensor end of the thermocouple out of the mounting position. Some wriggling may be required, but a slow steady backward pressure should slowly remove it from the clip that holds it in.
- Replace the mounting hardware for the thermocouple. These degrade along with the unit, so replacing them is a good step. Mine crumbled when I grabbed it.
- Insert the sensor end of the thermocouple into the new mounting hardware. Attempt to position the end of the sensor where the previous sensor was positioned.
- Reroute the lead to the gas valve body.
- Attach lead to the valve body. Patience is key, and try to turn it both ways until it catches thread.
- Reignite the pilot and see if it will stay lit. Take a look at the position of the sensor tip, the tip should be ½ inch into the pilot flame.
- Give it a while and make sure the hot water heater is working properly.
- If it is, good work. You just saved $500 replacing the unit, or at least a $100 service call
Truth be told, I am not an expert at this particular repair. I did however find it easy to pull off, so I didn’t even stop off at Youtube University to see if I was doing it right. Taking a look at the following videos, most people recommend taking off the whole burner assembly to replace the Thermocouple. Repairing it this way is recommended but not entirely necessary on older models.
Parts List: (Everything you need to do one of these!) Affiliate links help support our cause.
Hopefully you have found this helpful, or at least inspiring enough to help you diagnose it yourself. Until you have the budget to hand-off all maintenance to someone else, diagnosis can save you a lot of money in the long run.
Good luck with your rentals, and keep them durable. Let me know if I missed anything obvious in the comments section below. Cheers!