Best Smoke Detector for Rental Property

Smoke Detector Sourrounded By Smoke

Finding the best smoke detector for a rental property is daunting.  I have struggled with this a couple of times due to the rapidly changing technology in this space, and the ridiculous price increases have been seen as well.  So, here is a checklist of features to consider along with our recommendation for the best smoke detector for rental properties.

Local Smoke Detector Rules Vary

Municipal codes vary for how many and what type of smoke alarms, and possibly carbon monoxide alarms, are needed through each dwelling unit.  This article will be written with basic practices in mind, and leave it up to the reader to find the nuances of their local fire codes.  This is the top item in occupancy inspections, so getting it right will keep the inspector happy.

Two Types of Smoke Alarms

According to the United States Fire Administration, there are two main types of smoke alarms using two different types of detection, photoelectric and ionizing.  This is beyond the scope of this article to explore the differences, but I can say that results are inconclusive on which type is better.  Proper placement of the detector, regardless of type, will be your best bet for catching fires early.

What About Carbon Monoxide Detectors?

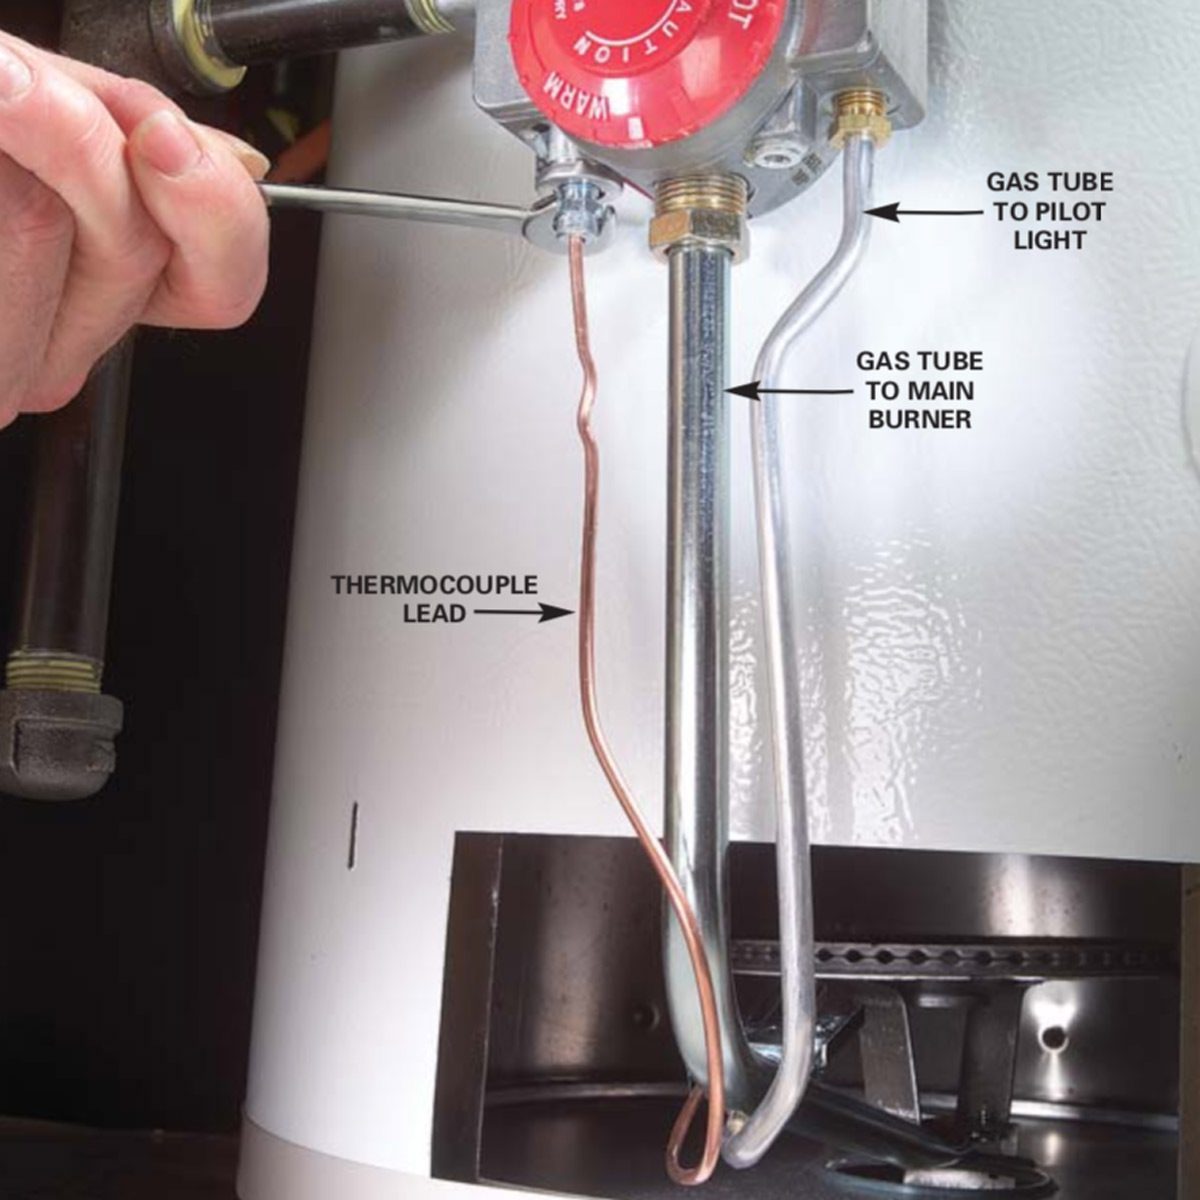
Carbon Monoxide is a by-product of the combustion of methane gas.  It can be issued by gas fireplaces, furnaces, water heaters, and any other source which uses a gas fire.  The buildup of CO can result in carbon monoxide poisoning, which is fatal, sneaky, and preventable. Usually, municipalities will require at least one detector on each floor.  These can be a separate detector or combined with the smoke detector. Either way, they are required if you have gas appliances anywhere in the building.  Keep reading to see how our recommended smoke detector deals with this.

Proper Placement of Smoke Detectors

Each municipality will have its own guidelines on the placement of smoke alarms, and they can be strict about it.  I once had to move a detector 6 inches to comply… Since they have put the thought into this area and made the rules, we aren’t going to. Follow their guidelines and put them where they want you to.  One thing to keep in mind though.  Some municipalities will not allow combined Smoke/CO detectors.  Check this first, because I recommend a combined detector if allowed.  Less clutter, less stuff to break/replace.

Best Battery Type in a Smoke Detector

In the last five years, lithium backup batteries have arrived on the scene and changed the game for some alarms.  This is the same battery that your cell phone uses, now in your fire prevention.  Why do we care?  Because these batteries are supposed to work for TEN YEARS!

Benefits of the Lithium Battery in Smoke Detectors:

  1. No battery swaps for the tenant.  This reduces the touchpoints on vital safety equipment in your building.
  2. No chirping smoke alarms.  Tenants frequently won’t replace the battery anyway, and instead, let them chirp incessantly.  This reduces the appeal of your building and can lower your rents.
  3. The battery backup runs out when the detector expires.  So nobody has to touch the battery until it’s time to put up a new one!
  4. No more replacing the battery yourself when the tenant didn’t!  If you replace it half the time (once per year) that’s about $40.  If you have to pay a handyman to tackle the battery, that goes up significantly.

Downfalls of Lithium Batteries in Smoke Detectors:

  1. The upfront cost of the unit is higher.  This can be lowered by buying enough for your whole building, or multiple properties at once.  Combine that with the reduced cost of the batteries over the years, and you can easily break even.
  2. If the unit decides to malfunction, there is no stopping it.  No battery to take out, just a permanent disable switch… Some have a guarantee which can help you with the cost of the new unit, but you obviously have to keep the receipt, which can be problematic.

What About Wired Smoke Alarms?

I highly suggest installing wired smoke detectors if you are doing a full gut rehab on a building.  I doubt it is cost-effective in a cosmetic rehab.  The hard-wired alarms don’t rely on the battery for power, but for backup power.  This is still a huge deal because these only chirp at night for whatever reason.  So, even with hard-wired smoke alarms, I suggest the lithium backup battery for ease of use.

What is the Best Smoke Detector for Rental Properties?

After all that explanation, here are my recommendations for smoke detectors for your rental property.  I suggest KIDDIE detectors for one reason, consistency.  These detectors stay the same shape, and use the same mounting plate (and plug type, for wired detectors) for at least 10 years now.  Just take one down, click the next detector in its place and you are good to go.  They also install in about 5 minutes.

Wired Combo Lithium Detector

What If I Need a Ground Level Carbon Monoxide Detector?

Some areas are now requiring CO detectors to be at ground level since CO is heavier than air. In that case, use this Hardwired Smoke Detector with Lithium Backup.

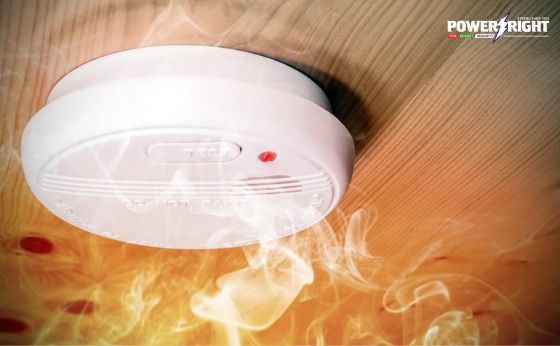
Best Battery Smoke/CO Detector?

This detector is my favorite for rental properties in our area. The buildings here are almost always over 100 years old, so wired detectors aren’t available. Having a Lithium battery powered detector means the tenant never touches it, which is always good for the life of anything in your unit.

Easy “Tin” Backsplash: Products, Costs, and Execution

During the renovation of any kitchen or bathroom, the backsplash around the oven or sink is a very easy way to really boost the appeal of the room. Depending on the material you choose, you really get a lot of bang for your buck. During our current BRRRR Project (see here), we are stretching our budget to the max due to a few unforeseen, major expenses (Pronounced plumbing overhaul). We chose a classic look that can be executed quickly and inexpensively, and it should last for years.

Enter the Tin Backsplash

We purchased our house in 2011 and one of the most eye-catching features that everyone mentioned was the tin backsplash in the kitchen. A classic pattern which everyone loved and still looks good today. After 8 years in the house, the backsplash is still in great shape and only needs an occasional wipedown.

However, I didn’t know until I reached up and touched it this year, that the whole thing is plastic! Seriously, who touches a backsplash? I would never have touched it, but I needed to install a couple so… Anyway. Generally, I am against installing anything plastic for fear of damage to a cheap material, but the fact that I had no idea it wasn’t metal and it still looks fantastic really sold me on it. So, I looked into the different options for the backsplash install.

Tin Backsplash Material Options

It turns out that there are basically two options for tin backsplashes: Actual Metals or Metal Looking Plastic. I thought about this for a fairly long time, and then I remembered, “My tin backsplash is 8+ year old plastic and it is in perfect condition!” This solidified my choice of going with the plastic tiles, I didn’t want to worry about them rusting due to a steamy kitchen.

Tools Needed to Install a Tin Backsplash:

  1. FASADE Tin Tiles– I shopped around and I couldn’t find anywhere that sold them for less than $19/ per panel. I needed 4, so $80.
  2. J Channel trim– The trim is a must to finish the sides. I got an 8′ piece for $4.00, and I only used about half of it.
  3. Corner Trim– I didnt have any corners on this one, but this is a must for a finished look for the corners.
  4. Ceiling Tile Adhesive– 1 Gallon of Titebond Ceiling Tile Adhesive- $14. The tub of goo is more cost effective than the tubes.
  5. Utility Knife
  6. Adhesive Spreader
  7. Scissors or Tin Snips

Surface Preparation

For this tin backsplash install, time was of the essence. I didn’t prepare the wall as I should have for proper adhesion. Ideally, the wall should be free of dust, debris, and residue. I just wiped mine down with a towel to dust it and knock any dirt off. Not fancy but worked very well. This seems to be plenty of prep for the quality of the project I was doing. However, you could degrease the wall with a dish soap solution and paint it with a good primer paint such as KILZ to really make sure none of your tiles are moving while you own the building.

Application- aka The Fun Part

The instant satisfaction of applying a shiny tin backsplash to an otherwise ugly wall is one of the better moments in a kitchen rehab. Start to finish it took 2 hours, and I messed a few things up which burned some time. I think I can do it in 1 hour in the next kitchen. Anyway, let’s get to it.

  1. Read the directions for everything! Do not blame me if I do something contrary to the directions, which ends up messing something up.
  2. Mark and measure the area to be covered, and pick a side to start on.
  3. Install the J-channel edging on your starting side, smearing the adhesive on the backside and sticking it to the wall. Make sure it is straight with a level.
  4. My panels needed a bare minimum of trimming to get them to fit. If your’s need trimming do it now. I trimmed the top edge on my panels because an average size adult cant see the top edge, it hides under any top cabinets you have installed.
  5. “Butter” the back with adhesive using the adhesive spreader. I found this very fun and there was something oddly satisfying about blobbing it on and spreading it all over. If your wall is uneven, add a giant blob or two to act as anchors.
  6. The FASADE panels have 2 flat edges which should be on the side of the direction you are going to be covering. They will be covered by the next panel. It is fairly self explanatory when you do it.
  7. Butter and stick the panels, checking with a level and lining up the pattern as you go to make sure it is straight.
  8. If you need to meet up 4 panels, you need to notch 2 of them to relieve the “bunch” caused by the 4 panels overlapping.
  9. When you get to the end of the run, butter up another J-channel and you’re done!

Things to remember

  1. I didn’t find the need to add J-channels to the top of the run, as it sits under the wall cabinets and I couldn’t see them from a standing position. I’ve never noticed it in my kitchen without sticking my head under there.
  2. Measure twice, cut once when it comes to electrical outlets. If you miss a cut, its near impossible to salvage that panel.
  3. Adding a panel you didn’t account for because you miss is a pain in the ass. So if you are going for speed; plan it once, and plan it right.

Costs and Time Spent

The length of the run on this tin backsplash was minimal, maybe 10 feet. There we 2 outlets which needed to be cut out precisely and that took most of the time for the install.

Time: 2 Hours

Costs:

Panels: $20 x 4 = $80

Adhesive: $17 (I used about 1/10 of the tub in this install)

Adhesive spreader: $3

J channel trim: $4

Total Cost: $104

Square feet to cover: approximately 14 sqft

Cost per sqft: Roughly $7.50

Conclusions:

Tin Backsplashes are a cost effective choice for renovations. They both look great after completion and can be installed quickly by a layman. It is an effective alternative to a tile backslash in kitchen, and could even be considered for bathroom applications with proper preparation.

Best Toilets for a Rental Property: What to Consider

A gold toilet
“I want a solid gold toilet, but it just isn’t in the card, baby…” Austin Powers

When looking to replace a toilet in a rental property there is a bunch of option to consider. Cost, build, seat type, height, length, dual flush, single flush, etc. It’s a hell of a list. The goal of this article is to cut out all of the decisions and give you a go-to toilet that works in most situations and won’t break the bank.

TLDR: A white, one-piece, chair height, toilet with an elongated bowl is king. If two-piece, get a model with a 3-bolt tank attachment.

Top Choice One-Piece Toilet

Top Choice Two-Piece Toilet

As a Home Depot affiliate, I may make a small commission on items purchased through our links.

Continue reading “Best Toilets for a Rental Property: What to Consider”

Kitchen Faucet for a Rental Property: What to Consider

When looking to replace a kitchen faucet in a rental property there is a myriad of option to consider. Wide base, narrow base, seperate handles, attached handles, single faucet, sprayer, finish type, etc… The list goes on. The goal of this article is to cut out all of the decisions and give you a go to faucet that works in most situations and wont break the bank.

TLDR: The Delta Foundations 2 Handle Faucet

Things to Consider When Replacing a Kitchen Faucet:

When replacing a kitchen faucet you want to consider the durability of the faucet you choose. Where will your tenants be touching, pulling, twisting, etc? How often will they be applying that pressure? You want this faucet to last for a decade or more, so putting a bit of thought into it now can save headaches and dollars later. Take a look at here for an extensive guide on the different types of faucets.

Wide vs Narrow vs Individual?

The majority of kitchen faucets will come in 3 varieties, Wide Base, Narrow Base, and Individual Components. During normal operation, force is applied to turn it on and off, adjust the faucet position, and use the sprayer. When a tenant applies any type of force to a faucet, you want it applied over the largest area to spread it out and reduce the risk of breaking a faucet or sink part, or wrose yet creating a leak. With that in mind, physics suggests a wide set faucet. The narrow and individual fixtures will require less force before damage is done. There is also a simplicity to installing the wide base models, taking a practiced hand less than an hour to properly install.

Sprayer, Integrated Sprayer, or Nope?

In my experience, sprayers are an excellent way for tenants to get water outside the sink basin… which should be avoided for obvious reasons. It is also a heavily handled piece of plastic, never a recipe for durability. The standard sprayer for sinks, going back decades, is the stand alone sprayer usually situated to the right of the faucet. With a dedicated hole for mounting through the sink, this type of sprayer is preferable if you have one. When pulled, the force of the motion is never applied to the faucet, only the sink, which is preferable. The integrated sprayer applies the force to the faucet mount, and should be avoided.

PRO TIP: Here is something I have noticed with tenants; they don’t miss the sink sprayer if it isn’t there! Seriously, I have never been told this is a deal breaker when renting. So, why have one? I have opted to not have sprayers in my units unless they came with the building or as a package with the sink. Any faucet replacement I have to do I delete the sprayer and install my go to faucet, which doesn’t include one.

Faucet Finish Type

Why in the world should I care about finish type when replacing a kitchen faucet? Who cares? Well, I dont, not really. If I am going for a theme throughout the kitchen, then I try to match the rest of the fixtures and possibily the appliances. But, since we are on the topic, here is some food for thought.

  • Chrome: Cheapest option. Can rust and will show finger prints and scratches.
  • Brass: Cheaper, and looks that way. Turns green with corrosion.
  • Brushed Nickel, Steel, Etc: Hides fingerprints and grime. Matches most appliances.
  • Antique (Oil Rubbed) Bronze: More Expensive. Trendy.
  • Stainless Steel: Probably the most durable option, but can be expensive.

My go to faucet in my rental properties has a brushed nickel finish for the most economical finish I could come up with.

Construction- How the Faucet is Built

One word, Metal. You want a faucet made from solid metal with brass fittings in your rental unit. Plated plastic found in the super economy faucets flakes quickly in the rough hands of a tenant, and will need replacing more frequently. Plastic fittings are garbage and strip easily, leading to costly leaks under the kitchen counter. Skip the garbage models and get something solid.

My go to in my faucet in my rental kitchens is a solid construction unit with an 8″ base. This was it has a large, single mounting surface to seal. The larger size allows for more torque to be applied without worrying about damage to the sink. The best part is, it’s an economical unit from a respected brand and it looks good. It is really hard to argue with all of these qualities.

The Best Kitchen Faucet in a Rental Kitchen is:

Best Faucet for Rental Properties
Delta Foundations 2-Handle Faucet- Stainless Steel

The Delta Foundations faucet in Stainless Steel is around $70-$80, depending on where you get it. It has all of the most durable features mentioned in this article, and is from Delta, a reputable brand of faucets and such. There is no sprayer to break. The handles are simple and only move on one axis. and the base is wide and has a single edge to seal to prevent leaks and damage.

I highly recommend this faucet and I have had plenty of luck with it in a couple of my units. It is my go to for replacements and I can install it in 30 minutes. If you couple this with the Snap it drain repair kit while you are under there, you should have a trouble free kitchen sink for years to come.

As always, perfect is the enemy of finished, so please let me know if you have anything to add, I would love to hear about what has worked for you in your rentals or home.

Cheers,

Kyle @ durable rentals

Replacing a Thermocouple on a Hot Water Heater

AKA: How to spend $10 to save $500-$1000

Replacing a Thermocouple on a Gas Hot Water Heater
They are never this clean, but this is basically how all the gas hot water heaters I have seen look

There is always a bit of panic that comes over me when a tenant calls with hot water issues, for two reasons. First, tenants get very grumpy very quickly when there is no hot water, so time is of the essence.  Second, this could get expensive quickly. This time around, we quickly diagnosed the problem to be the thermocouple and replaced it just as quickly. So I thought I would write up a quick run-down of how we worked through the problem and quickly replaced the thermocouple to avoid making an expensive plumber call.

How do Thermocouples Work?

Thermocouples are brilliant pieces of technology invented in 1821.  It is nearly universal on gas water heaters and hasn’t really changed in the last 30-50 years.  It works through a nice little physical chemistry trick. Two metals are alloyed together and when they are heated they conduct a small amount of electricity.  This electricity activates an electromagnet which allows the gas to flow. If the pilot light goes out, the electricity stops flowing, and the magnet shuts off the gas.  It’s really a clever way to make sure we don’t blow ourselves up with something so simple.

How Do Thermocouples Stop Working?

Thermocouples stop working from being in the flame of the pilot light.  The flame slowly oxidizes the metal and it degrades. As the shape of the thermocouple and the composition of the alloy change from degradation, the electricity generated will diminish until it can no longer energize the electromagnet to keep the gas flow open.  In a nutshell, the pilot light won’t stay lit. Regardless of what you do, the dang thing just goes out repeatedly.

How Do You Replace a Thermocouple on a Hot Water Heater?

Science aside, actually replacing the thermocouple is pretty simple.

  1. Identify the thermocouple at the gas valve, and note how it is routed.
  2. Remove the shields from the access area of the water heater. A screwdriver might be needed.
  3. Turn off the water heater.  Let it cool if it was on before you started, maybe 10 minutes.
  4. Using an adjustable wrench, loosen and detach the thermocouple from the gas valve body.  It is upside down and my be threaded in reverse, so try turning it both ways to see which way it needs to go.  Try to remember this to reduce frustration when hooking it back up.
  5. With a channel locks or vice grip, slowly ease the sensor end of the thermocouple out of the mounting position.  Some wriggling may be required, but a slow steady backward pressure should slowly remove it from the clip that holds it in.
  6. Replace the mounting hardware for the thermocouple.  These degrade along with the unit, so replacing them is a good step.  Mine crumbled when I grabbed it.
  7. Insert the sensor end of the thermocouple into the new mounting hardware.  Attempt to position the end of the sensor where the previous sensor was positioned.
  8. Reroute the lead to the gas valve body.
  9. Attach lead to the valve body.  Patience is key, and try to turn it both ways until it catches thread.
  10. Reignite the pilot and see if it will stay lit.  Take a look at the position of the sensor tip, the tip should be ½ inch into the pilot flame.
  11. Give it a while and make sure the hot water heater is working properly.
  12. If it is, good work.  You just saved $500 replacing the unit, or at least a $100 service call

Truth be told, I am not an expert at this particular repair. I did however find it easy to pull off, so I didn’t even stop off at Youtube University to see if I was doing it right. Taking a look at the following videos, most people recommend taking off the whole burner assembly to replace the Thermocouple. Repairing it this way is recommended but not entirely necessary on older models.

Parts List: (Everything you need to do one of these!) Affiliate links help support our cause.

Hopefully you have found this helpful, or at least inspiring enough to help you diagnose it yourself.  Until you have the budget to hand-off all maintenance to someone else, diagnosis can save you a lot of money in the long run.  

Good luck with your rentals, and keep them durable.  Let me know if I missed anything obvious in the comments section below. Cheers!

Product Shoutout: Using Snappy Trap for Bathroom Drain Repairs

The Easy Way to do Bathroom Drain Repairs

If you are in the business of doing your own maintenance, there is nothing worse than showing up to do a repair and not having all the parts you need. You get to bother your tenant a second time and it costs you time to go get the part. Well, I had to do a bathroom drain repair recently and came across this exact situation. (Contains affiliate links to keep the site going)

Here’s How it went:

  1. Assess the leaky bathroom drain from a tenant photo and guess what the problem is.
  2. Go to Home Depot and buy what I thought I needed.
  3. Enter unit and attempt to make the repair.
  4. End up not having the correct parts and wasting time going back to Home Depot
  5. Find and buy Snappy Trap Universal Drain Kit for Bathroom Sinks.
  6. Return to make repair.
  7. Replace the entire J-Bend with the parts from the Snappy Trap.
  8. Go home and enjoy my family

Enter the Snappy Trap!

I used the all-in-one bathroom drain set, and it was great. There were several issues with the previous drain assembly using some very cheap parts (Pronounced flex-hose). There was also a mismatch of sizes since the new replacement drain was 1.25″ and the previous plumbing was 1.5″. This made the repair difficult to perform and I knew that it wouldn’t be the best option.

The Snappy Trap kit came with literally everything I needed to make the repair; tail piece extension, P-trap piping, smooth interior flex pipe to run to the wall, several connections to connect everything, and several adapters in case the pipe size changes anywhere. You can see in the diagram below everything that is included. It covers nearly all situations for repairing a bathroom sink, and its very inexpensive.

Everything you need for Bathroom Drain Repair

All in all, the repair took 30 minutes after I had this kit. The previous step, you know the one where I had to guess at what I needed, also took 30 minutes… And the 2nd trip to Home Depot burned 60 minutes because that place is worse than Walmart as a time suck. Therefore, I could have saved 90 minutes if I had grabbed this unit in the first place, and I will from here on out.

Everything You Need for the Repair

I thought it would be useful to include a start to finish list of items I needed to do this repair correctly.

I chose a specific type of drain assembly to reduce the amount of bathroom drain repairs you need to do for your rental property. An article is in the works on why I chose this particular design. I link it when I am finished with it.

Oh, and I thought this would be useful as well! Trap kits for single and double kitchen sinks. In case you need them in the future you can click through here to support our efforts to produce additional content. Cheers!

Snappy Trap 1 1/2″ Drain Kit for Single Kitchen Sinks, Bar Sinks and Laundry Sinks

Snappy Trap 1 1/2″ All-In-One-Drain Kit for Double Bowl Kitchen Sinks

Snappy Trap Special Kit for Double Kitchen Sinks with Limited Vertical Distance between Sink Strainers and Wall Drainpipe

Good luck and let me know if you have questions. I am not a plumber, but this isn’t rocket science and your only goal here is to make sure the water stays in the pipe. If you’re not comfortable attempting this, hire a plumber or handyman to get it done.

BRRRR Case Study Part II: The Inevitable WTF Step

This is Part II of our BRRRR Case Study, focusing on the unmentioned “WTF step” that seems to happen to new investors somewhere in the project. Let me attempt to explain:

The WTF step is the difference between going to an open house and actually buying that home. It’s the difference between test driving a car and loving it and owning that car and learning all of its flaws intimately. It’s the difference between the theoretical investment on paper and owning an investment property. Basically, the difference is the rose colored, honeymoon period vs. the gritty reality. To me it is the most overwhelming, run and hide moment I have faced in REI, which is why I am trying to explain it here.

In the case of Alberta, I missed a few things in the honeymoon period that should have been obvious if I wasn’t so excited. I want to say it is fairly normal, but that may just be me justifying my errors. So, I made 3 fairly large errors which I should have seen if I was more analytical.

Cockroaches:

I live in a fairly clean house, and I spray for bug as recommended by the label of the “Bug Shield” stuff from Home Depot. It seems to work and I have seen one cockroach in my basement in 8 years of living here. I killed him with extreme prejudice and move on with my day. So I have a hard time understanding how people live in a manner in which allows for cockroaches to co-exist with humans in the same space…

But these tenants were used to it, like it was a fact of life… Most of them were just living day to day with cockroaches in many places, but 3/4 units were overrun. One unit was occupied by a not so pleasant woman (one of the sisters from the previous article.) Happily, she moved out so I started the Cockroach Genocide.

The final unit looked abandoned and a tenant has not returned since purchase. This unit had a stank to it which was terrible and hard to pinpoint… Imagine you are at an all day, outdoor concert in August. Its asses to elbows to asses and all the asses are swampy. Now imagine sitting down with your face at ass height and inhaling deeply. Its the stank of dirty, sweaty, ass-y people. Now multiply that by 5x and we are getting close. Needless to say, the cockroaches have made a city in the kitchen. Genocide has started and I am winning, at least in the open.

I think I could have handled the cockroaches on my own, no help needed. But then I spotted them…

Bedbugs:

Cockroaches are a walk in the park compared to the WTF factor of bedbugs. Why? Because you don’t usually take cockroaches home to your family, because roaches don’t feed on humans, and they usually stay away from your bed. The cost of getting bedbugs out of your home is sky-high, so the terror of bringing them home to my family is very real. 2/4 units have confirmed bedbug sightings. I am assuming the others have them but are missing furniture for them to play on…

The cost to get rid of both infestations was around $2500. That included a full building heat treatment, where they used industrial furnaces to kill the bedbugs by heating the units to 140 F, and wrapping the singled remaining bed in a bedbug repellent cover. After that they sprayed every other weak for cockroaches. It has been very effective so far.

Front Doors:

The third thing I missed which should have been kinda obvious is the front doors. From the street they look pretty standard. Fresh coat of paint and curb appeal goes way up (currently poop brown). Upon closer inspection, several of the glass panes have been replaced with plexiglass and the trim in beat to hell in places. One door is even partially wood putty due to severe breakage around the doorknob. All things I should have seen but for the rose colored glasses on an excited investor just looking at the possibilities, not the pitfalls.

It will costs at least $200/ door to replace them myself.

So, a word of warning when you are getting into REI: take a breath and take a look at the problem to solve, not just the potential for income. The BRRRR strategy hinges on assessing the rehab of the building and sticking to the budget. The rose colored glasses are detrimental to the proper building of a budget, so keep them in mind as you start your journey.

BRRRRR Case Study: Alberta 4 family

This series of articles will track our entire investment process on our newest property, which we will refer to as Alberta. It is a 4-family property in Saint Louis. We are attempting to BRRRRR the property, so we will be tracking each step. So without further explanation:

The purchase of Alberta:

How I found the deal: I am a sales agent in Saint Louis, and we specialize in Investment Properties. I called on a property and the owner said he was so burnt out and he wanted to liquidate his entire portfolio. The catch was that he wanted to sell it all as a package. I couldn’t do that. Enter John.

John is a real estate investor/contractor who has the means to buy the 7 properties, straight cash. He also has the experience to know that is was a good deal. We go and look at all of the buildings, and most of them are in surprisingly good shape. He negotiates a bit and settles on a price, and we move to close.

After looking through all the the properties, Alberta sticks in my head. I notice that 3/4 units are occupied, and all of the units are in roughly the same shape. They are rough by modern means, but livable at the $375/month that each tenant is paying. Two of the tenants are sisters as well, which I interpret as they are here to stay.

After checking it out with a contractor, who estimates the rehab between 10k-15k (for a few exterior items and updating the vacant unit.) I start with an offer of $50k. No need to pay retail. We go back and forth, and land on $60k for 4 units in Dutchtown. Score, building under contract.

TLDR Contract Details: Cash offer for simplicity and speed, inspection contingency as an escape hatch for lateral issues, and closing on the same day as John. He makes over $35k in one day selling this property to me, which I still think is a good deal.

Funding Our Deal: Since we have around 75% equity sitting in our house, we apply for a HELOC for $105k. This will cover the purchase, closing costs, and rehab costs for the startup stage.

TLDR HELOC Terms: Home must appraise for $220k since 90% of the equity is a step up in the APR. If we stay under the 90% threshold, our rate is 5.25%. The loan amortizes on a 20 year schedule, with a 5 year readjustment term. This is very close to the terms of a commercial real estate loan. The only cost for opening this Credit Line was the cost of the appraisal ($300)

TLDR LLC Loan Terms: To separate my money from company money, we are acting as a private lender to our LLC. We are going to lend the LLC money from the HELOC at +1% of cost for 0.5-5 years. The structure is undecided as of now, but something along the lines of 20 year amortization with a balloon payment at 5 years should cover it. This is a rate of 6.25% for the company, also not bad if you have ever shopped for private money loans. While the loan itself isn’t a great investment, it effectively eliminates “commingling” of funds, which gets sticky if something goes south. It will also create a $50-$100 cashflow each month for our family, which is excellent.

Estimating utilities is one of those places where you can miss by a lot, and it can screw you if your cashflow isn’t excellent. So wrapping your head around a good system for estimating those utilities you have to pay for makes it easy once you have it in place. It’ll be different for each municipality, but once you have a down for one then you can use it over and over again.
There were three bills for this project we had to estimate before making our bid were water sewer and trash. These are currently the three that St. Louis city landlords are expected to pay.
Water–   Water is the hardest utility in St. Louis city to estimate for landlord. This is because they use a flat rate system and charge by room or by toilet or by shower or whatever. So knowing how many rooms they’re charging you for is important, and I have heard people argue about that to lower their bills. STL City Water Rates
 Sewer– Sewer is based on your water bill and I didn’t have a great way to estimate that for this project. MSD Rates
Trash –  trash is easy, $14/unit. So this building will be $56/month. STL City Waste

Electric and Gas– Electric and Gas are usually handled by the tenants, but the landlord is responsible for these in vacant units. The easiest way to handle this is call each utility and get the “Landlord Leave on” set up. Its kind of a pain to set up, but easy to add additional units/buildings to once its going. It saves on costs between tenants, since if it gets shut off they charge a fee to turn it back on.

Insurance: Insurance should be set up prior to purchase and go into effect on the date of purchase. Shelter Insurance quoted around $500 annually, but upon inspection the exterior of the building needs to be brought up to their standard before they will underwrite it. They have a higher cost alternative through Foremost at $1000 annually. Do able until we can fix a few things and get into the Shelter policy for a huge revenue recapture. Shop around and see what people will insure, the rates vary wildly.

I think that’s about it for the purchase phase. Let me know if you have questions and I will try to update the article with extra info which your questions will help me fill in.

Durablerentals.com- Goals

Goals for the Durablerentals.com:

Since I have officially written my first article on  Laminate Countertops, I thought it would be useful to explain what the goals of this website were, for myself as well as anyone who is interested:

  1. The primary goal of this website and these articles is to provide real estate investors with a resource when they come upon the question, “What is the best X to install in my rental?”
  2. The second goal is to compile the different techniques investors are using around the country to protect their investments.
  3. The third goal is to review products on their ability to hold up in the rental property setting.

I will use three standard ratings for evaluating each topic or product:

  1. Price: How much does this item or type of fixture cost comparably?  Is it worth the money?  Does that extra cash get you something extra, something above and beyond the other options?
  2. Durability: How does this item or type of item last over time when in the hands of a tenant?  What engineering features make this last longer? Is there anything extra you can do to improve the durability of items?
  3. The WOW factor:  Will choosing this option bring me more rental income or will it be a hindrance?  Does this item stand out in the consumers mind to make them like the place more and possibly pull the trigger?

So there it is.  Hopefully someone out there finds it useful, but if not I will have a repository for my knowledge.

Best Countertops for Rental Properties- Laminate

Best Countertops for Rental Properties- Laminate

Are laminate countertops a good option to install in a rental property?  Will it endure or crumble under the often harsh hand of the renter chef?  Will laminate countertops give a good bang for their buck?

To help new or experienced real estate investors find the best option for their unit, this article series will go in depth into the main countertop materials.  Today we start with Laminate, also known as Formica or Wilsonart.  It is a low cost option which can be DIY installed in an afternoon.

History and Construction of Laminate Countertops:

Notice the lack of texture, depth, or color variation.

If you had a childhood before the year 1990, you remember laminate countertops.  Largely known as Formica, your parents probably had them in a single color which was probably ugly by today’s standards.  Today’s laminate countertops are much better looking than their 80’s counterparts, but are they a good option for your rental kitchen?

Laminate countertops are produced in a similar manner to laminate flooring.  Basically it is a hard layer of plastic over an engineered wood base.  The laminate itself is composed of the following layers:

  1. Backing material which is glued to the substrate (usually particle board)
  2. Core material: The bulk of the laminate layer. This layer acts as a shock absorber for the rest of the laminate layer.
  3. Kraft paper: Provides depth to the image layer resting above it. Without this layer, the imitation stone products would look exceptionally fake.
  4. Print layer: The decorative layer with the image printed on it.
  5. Protective Top Layer: This layer gives a hard barrier between tenants and the layers below it.
    Nifty hardware for laminate countertop miters.

Average Cost of Laminate Countertops:

In terms of cost, laminate is the least expensive option you can buy.  There are cheaper options you can DIY, and maybe we will get to that in another post in the future.

As of mid 2018, using Home Depot as a reference point, the price is roughly $1-$2 per linear foot.  So for a 30 linear foot kitchen, it will cost $300-$600 to purchase the counter material.  That seems a pretty fair bargain if you are on a budget.  Along with the actual counter, you will also need screws, liquid nail, a jigsaw to cut the sink hole, and a sealant for the seams.  So, add $50 to your total, and you are still replacing a counter at minimal costs compared to the solid options, if you decide to install it yourself.

Several factors will affect the price of the a laminate countertop.  The quality of the image will be the main factor.  A cheap image will look “papery” and reduce the WOW factor of the countertops quickly. The edge of the countertop, if it has a build in backsplash, and the height of the backsplash will also affect the price of the product.

Installation of Laminate Countertops:


Depending on the configuration of your kitchen and how many pieces you need, you will most likely need a truck to transport your pieces from the store to your kitchen.  Compared to other materials, laminate countertops are close to the lightest option, but carrying a ten foot pieces of anything is unwieldy.  I recommend having a friend help with moving the pieces to avoid busted backs or windows.

Unlike materials like granite or quartz, laminate countertop installation requires a few more tools to complete.

Tool List:

  • Power drill
  • Circular Saw with trim blade
  • Rubber mallet
  • Level
  • Scribe (optional but recommended)
  • Belt sander (also optional)

A simple installation requires a circular saw to cut pieces to the length of the run.  Use a guide to ensure the saw cuts a straight line.  Always cut the straight cuts as opposed to the mitered side since the mitered cuts require special machinery to do correctly.

The drill will be used to connect the countertop to the top of the cabinets via corner brackets.  Be careful to purchase the correct length screws so you don’t go through.

The rubber mallet is used to set the miter joint straight when tightening the miter bolts.  You can use your fist, but I wouldn’t recommend it.  A special glue is used to glue the seam and the miter bolts are used to cinc

Nifty hardware to make the laminate countertop miter a cinch.

h the seam together.  I don’t suggest silicone for the seam.  While it seems it should be a better sealant to keep out liquids, it leaves a sticky residue which will need to be scraped off with a razor.  I recommend the glue.

Finally, the scribe and belt sander are used to match the edge to the wall if it isn’t exactly true.  See the above video for these steps as they are plainly described and shown.

Moisture is the main enemy of the laminate countertop.  If a significant amount of moisture comes in contact with the MDF/particleboard underside, it will swell and flake.  It is a critical step to ensure the seams and the sink are properly seated and sealed.  If they are not properly sealed, you may as well plan to replace this countertop annually.  Dishwashers also require a special moisture barrier to be installed above the unit.  The steam generated by the dishwasher’s operation will accumulate under the countertop.  Without the moisture barrier installed, the steam will damage the countertop from underneath and ruin it over time.

Durability of Laminate Countertops:

Durability is the main weakness of laminate countertops.  The base material is prone to water damage and exposing the underside of a laminate countertop will cause it to expand and bubble.  As the laminate layer is essentially a plastic sheet; age, chemicals, and sunlight can cause discoloration and brittleness.  Abrasions in the surface are also highly visible and virtually unrepairable, bringing down the “WOW” factor of even a nice laminate surface quickly.

The premade laminate countertops can sit in the store for months before you purchase it.  Problematically, the big box stores do not seem to store them correctly horizontally, which sort of makes sense since they can be pretty big.  However, while they are stored vertically or at even a slight angle gravity will work its magic and cause this product to warp.  This is the main negative review of these products and should be considered when purchasing.  They may settle back into relative straightness while sitting in the house, and can be pulled to the cabinet top with screws.

Conclusion:

Laminate countertops have come a long way since their heyday in the 90’s.  The look and feel is drastically improved due to improved printing technology.  However, the durability versus stone counterparts is lacking and repairs cannot be made to the surface.  The WOW factor is less than most countertops as well.

These countertops will serve in a financial pinch, if you are over budget and need to cut something.  However if you have the budget to get granite, the durability is probably worth it.